Was this helpful?
VideoWave | Setting up your product
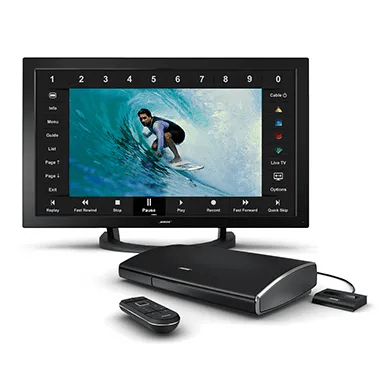
Setting up the VideoWave.
The VideoWave has two options for setup. It can either be setup using the attached table stand or the stand can be removed and the AV Monitor can be attached to the wall.- To set up the system using the table stand, follow these steps:
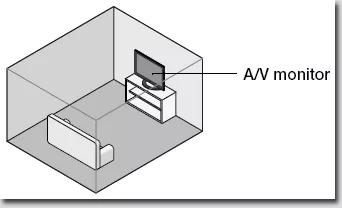
- Place the A/V monitor on a stable, flat surface capable of supporting the weight of the A/V monitor
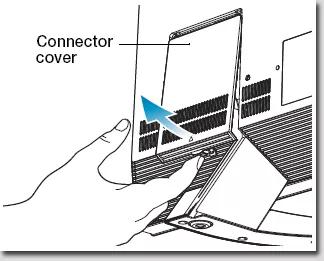
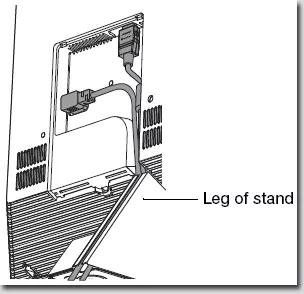
- On the rear panel of the A/V monitor, firmly pull out on the bottom of the connector cover to remove it
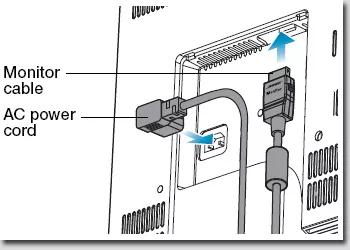
- Attach the A/V monitor cable and AC power cord to the A/V monitor. Be sure the A/V monitor cable is pushed in slightly to release the snares holding it in place
- Route both cords through the leg of the stand and re-attach the connector cover
- Plug the other end of the AC power cord from the A/V monitor into a power outlet
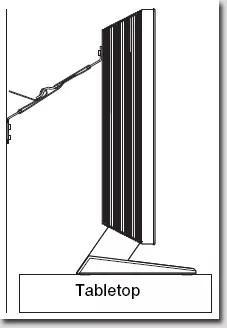
- Bose strongly recommends using straps to help prevent the TV from tipping. To use the straps, follow these steps:
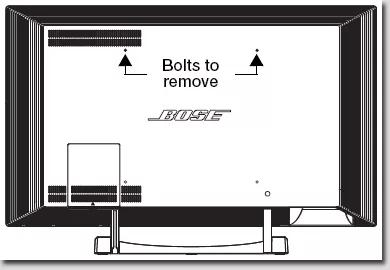
- Using a 5/32" (4 mm) hex wrench (not included), remove the top two bolts from the rear panel of the A/V monitor
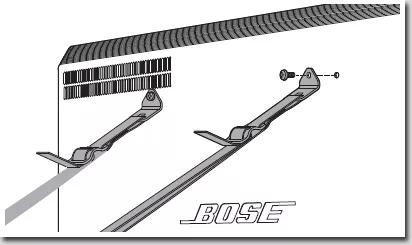
- Using the same bolts, attach the two straps to the back of the A/V monitor
- Each strap should be attached to the wall stud closest to it. DO NOT attach both straps to the same stud
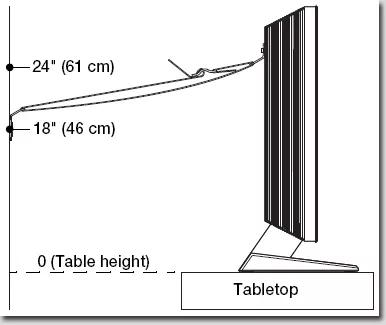
- Hold the bracket on the end of each strap against the wall 18-24 inches (46-61 cm) above the tabletop. In the center of each wall stud, mark the location of the two holes in the bracket
- Using a 7/64" (3 mm) drill bit (not included), drill four pilot holes
- Secure each bracket to the wall using two of the provided screws
- Push A/V monitor as close to the wall as possible
- Tighten the straps to remove any slack between the A/V monitor and the wall
- Bundle the remaining length of the straps and secure them out of reach behind the A/V monitor
- Using a 5/32" (4 mm) hex wrench (not included), remove the top two bolts from the rear panel of the A/V monitor
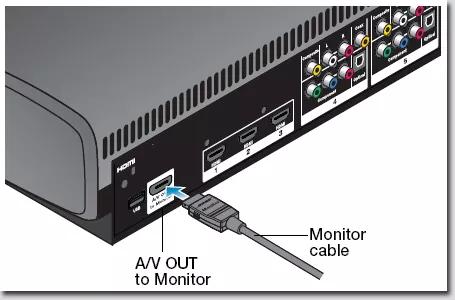
- Plug the free end of the A/V monitor cable into the connector labeled A/V OUT to Monitor on the control console. Again, Be sure the A/V monitor cable is pushed in slightly to release the snares holding it in place
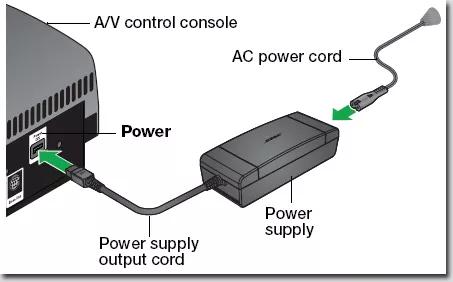
- Plug the power supply output cord into the "Power" jack on the control console
- Plug one end of an AC power cord into the power supply. Make sure to push the plug in as far as it can go
- Plug the other end of the power cord into a power outlet
- Place the A/V monitor on a stable, flat surface capable of supporting the weight of the A/V monitor
- To set up the system using a wall-mount, follow these steps:
- Attach the wall-mounting brackets (not included) to the wall and A/V monitor according to the instructions included with the wall bracket. The A/V monitor is VESA compatible but articulating mounts should NOT be used
- On the rear panel of the A/V monitor, firmly pull out on the bottom of the connector cover to remove it
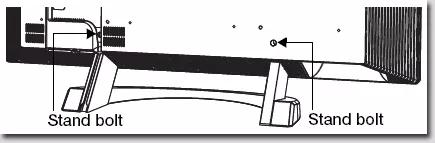
- Remove the two stand bolts using a 5/32" (4 mm) Allen wrench (not included)
- Attach the A/V monitor cable and AC power cord to the A/V monitor. Be sure the A/V monitor cable is pushed in slightly to release the snares holding it in place
- Lift the A/V monitor off the stand
- Attach the A/V monitor to the wall according to the instructions included with the wall bracket
- Plug the other end of the AC power cord from the A/V monitor into a power outlet
- Plug the free end of the A/V monitor cable into the connector labeled A/V OUT to Monitor on the control console. Again, Be sure the A/V monitor cable is pushed in slightly to release the snares holding it in place
- Plug the power supply output cord into the "Power" jack on the control console
- Plug one end of an AC power cord into the power supply. Make sure to push the plug in as far as it can go
- Plug the other end of the power cord into a power outlet
Run ADAPTiQ to maximize the system sound.
For more information on how to run ADAPTiQ, see ADAPTiQ system setup and deactivation.The ADAPTiQ audio calibration software, included with the system, automatically tests the acoustics of the listening area, analyzes speaker placement and tailors the sound of the system to the specific acoustics of the room.